LabelScan
A fast and efficient inventory counting app using mobile barcode scanning. Reduce errors and speed up inventory audits.
Key Features
- Barcode Code128 label scanning
- Offline operation
- User input item counts
- Scan and Count Data backend uploads
- Designed for retail or warehouse use
How It Works
App start Screen
Displays the app splash screen.
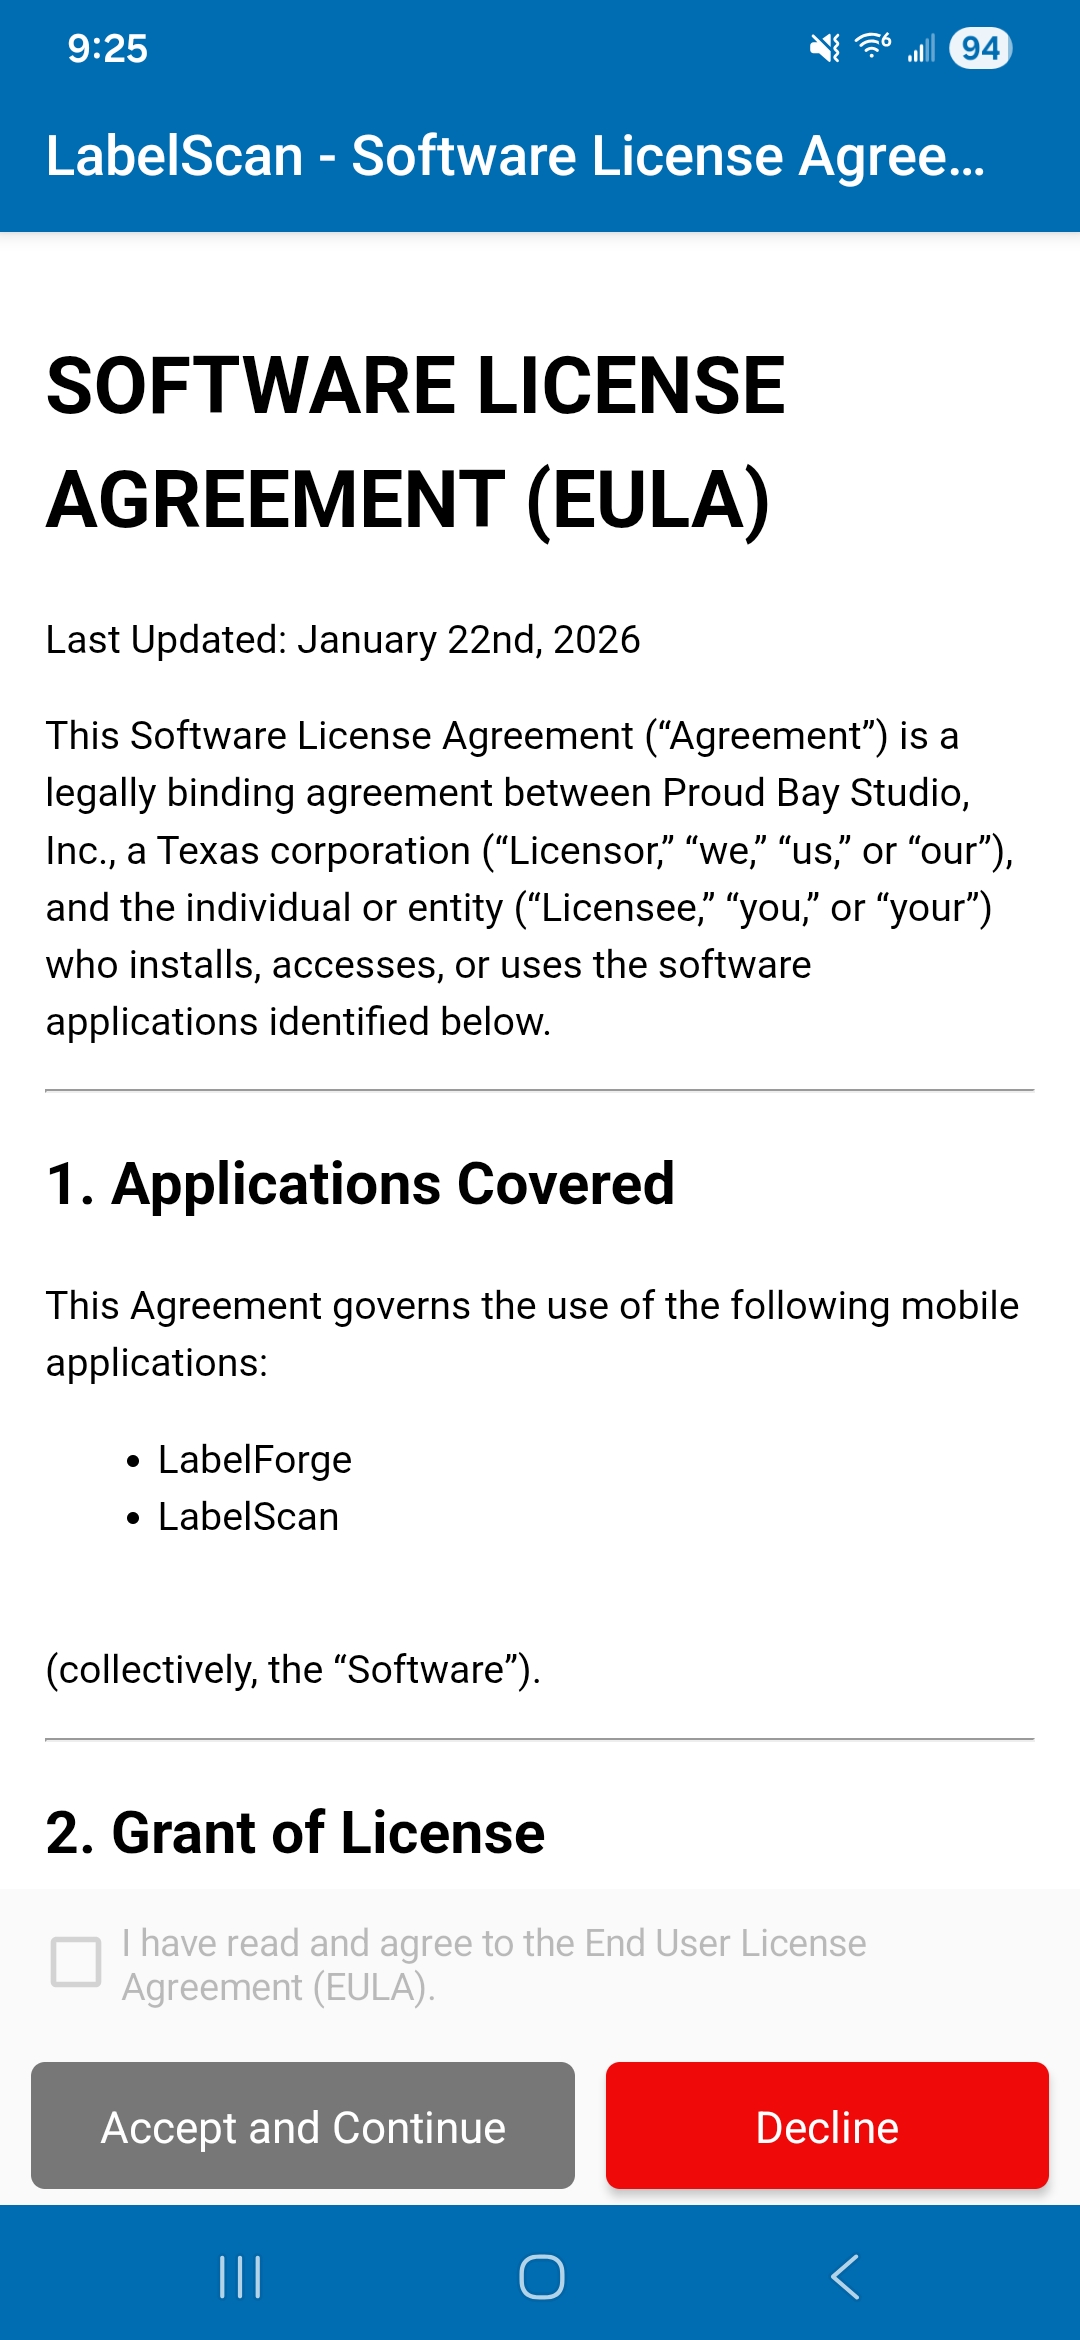
Software License Agreement
Read and accept the Software License Agreement to continue.
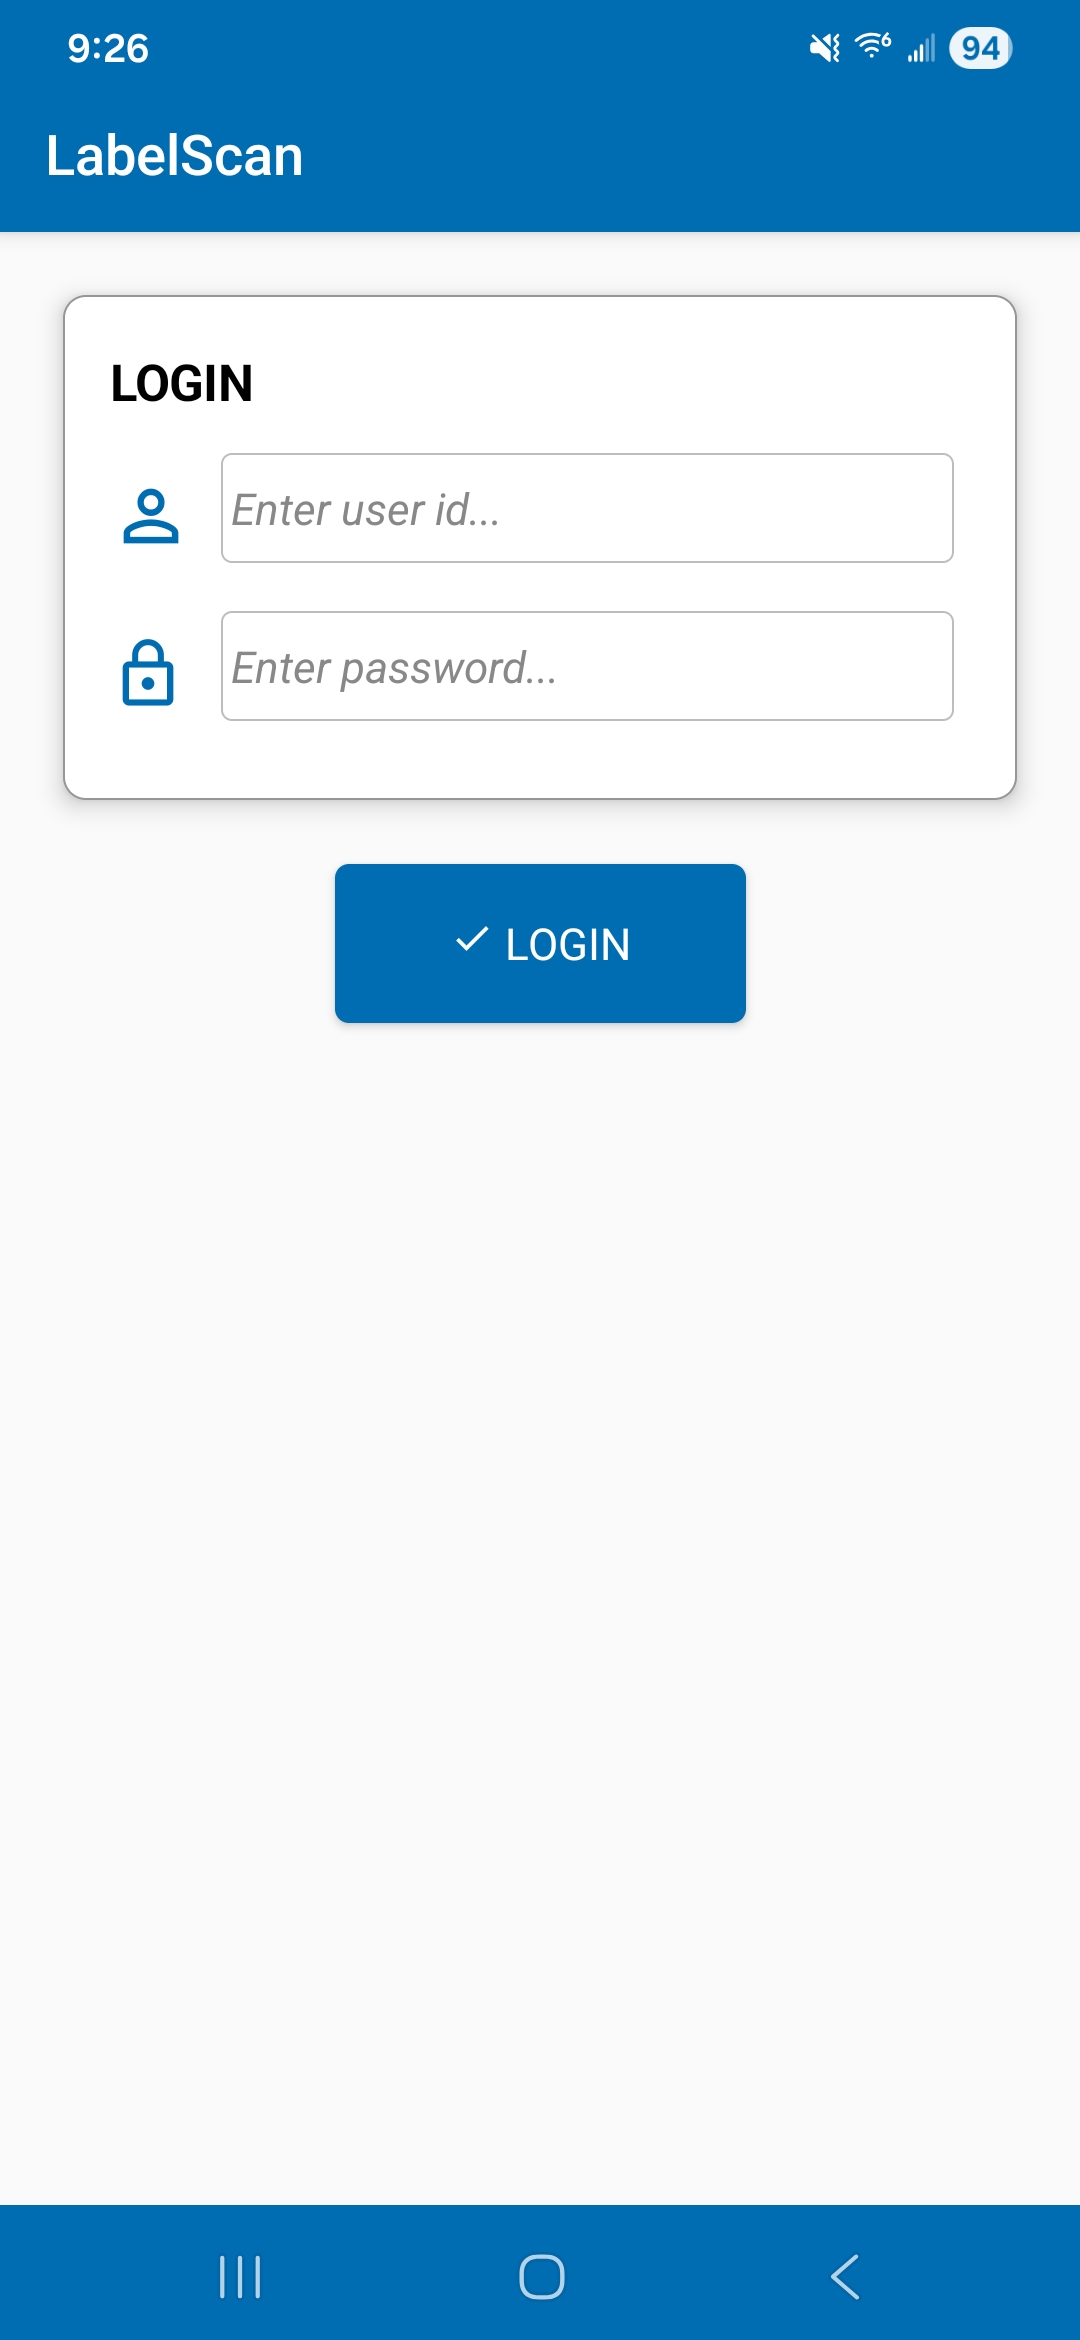
Application Login Screen
Enter your given login credentials to access the app features.
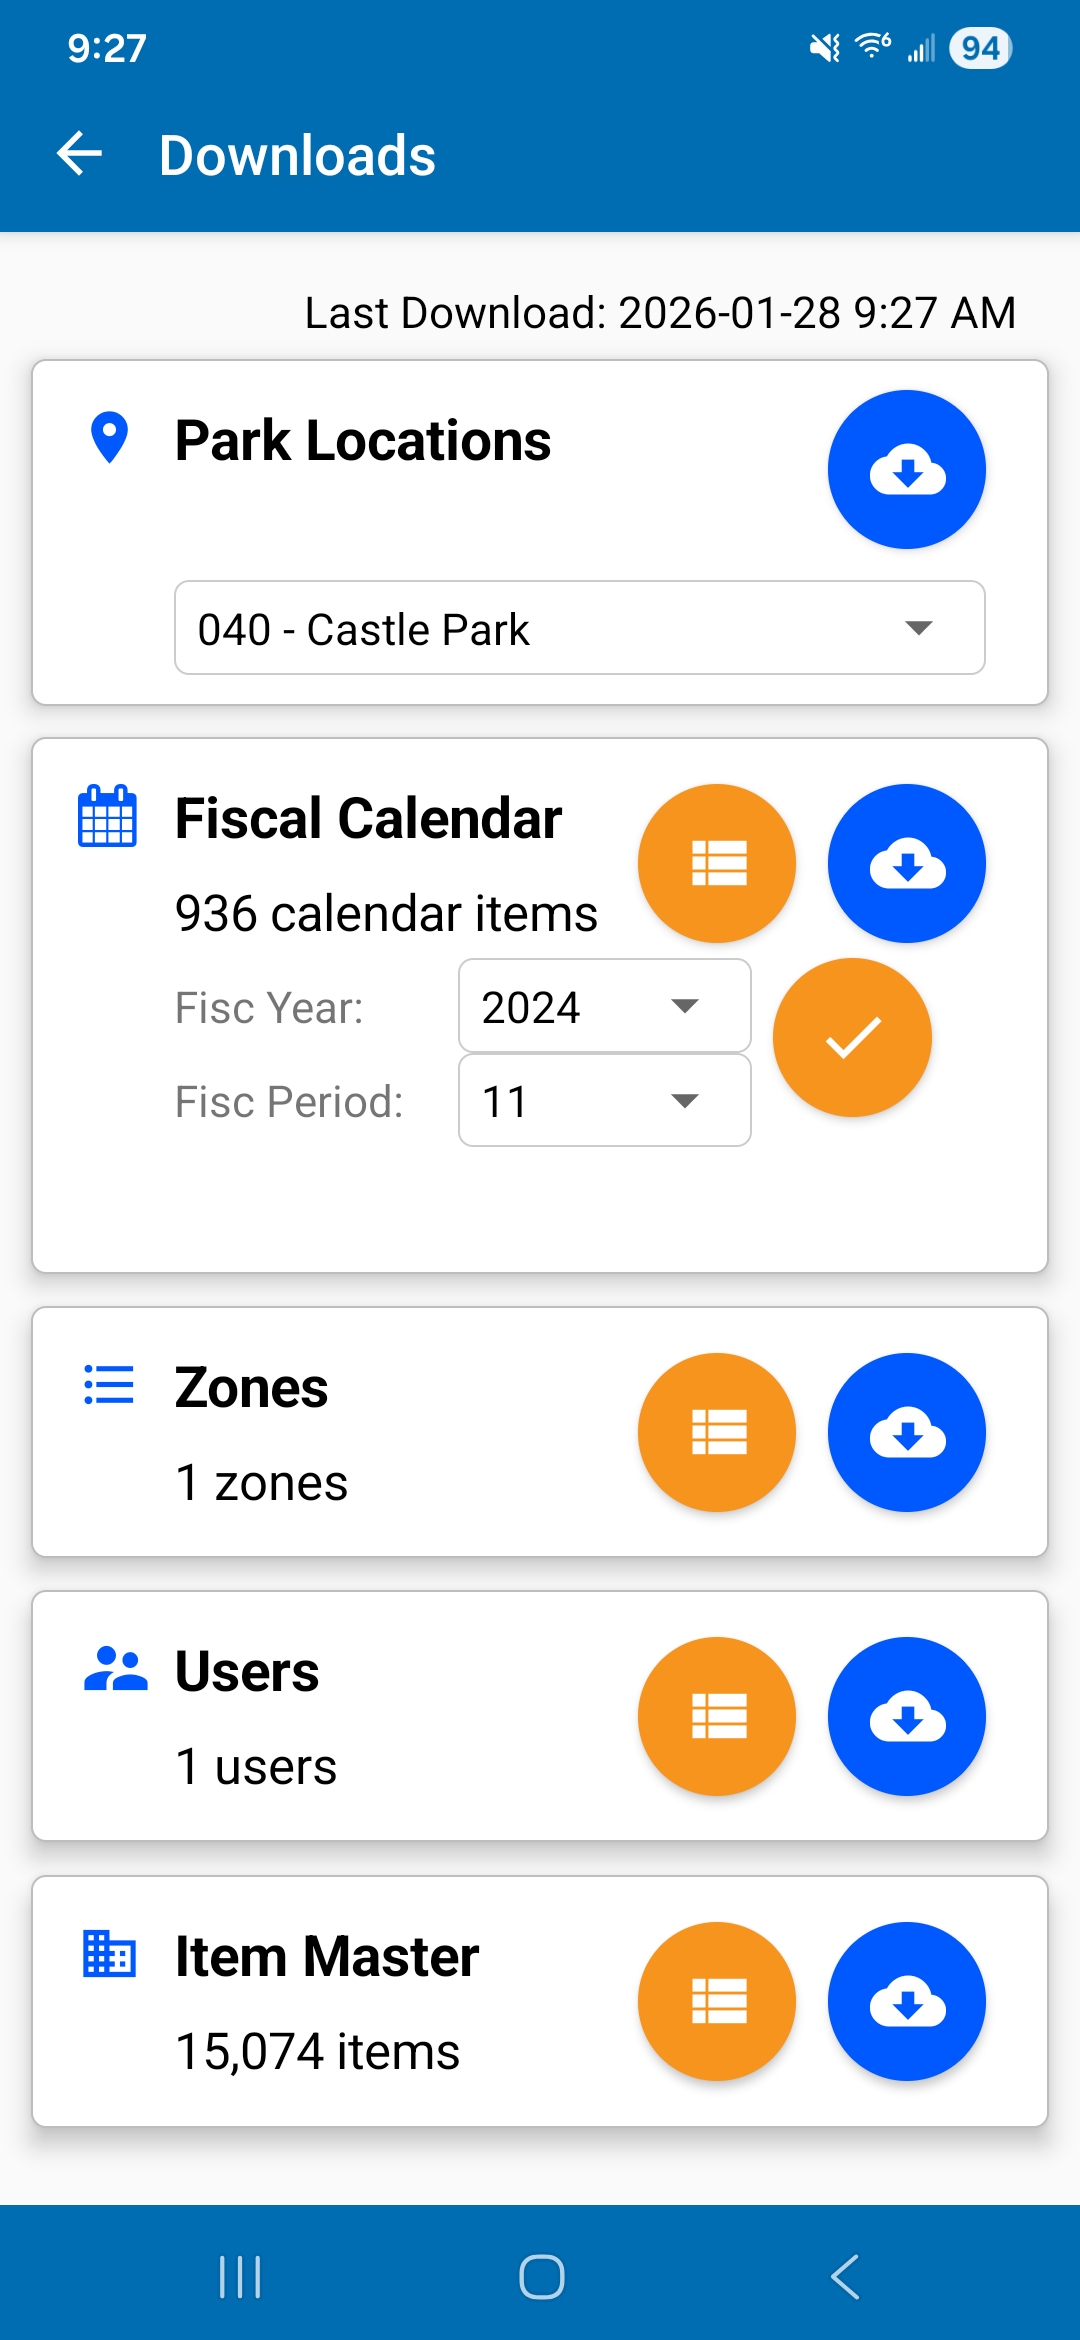
Downloads
Download all 5 areas of data before scanning & counting of items.
Park Locations - this data must be downloaded first before the other data can be downloaded. Select your Location before commencing other downloads.
Fiscal Calendar - next, download this data and set which Fisc Year & Fisc Period you are about to start counting. This information can also be selected from the Settings screen.
Zones - (Count Headers) this download is next. From the Palace Apps, you should have already setup the Count Headers, which specifies the "zones" or "areas" in which the counting will take place.
Users - users are next. they have been defined in Palace Apps, in the Count Headers grid. Each user from there is downloaded in this process.
Item Master - all active items are downloaded in this step. This step may take a few seconds, so give it time to download and finish saving the items to the local database.
Once all downloads are complete, return to the main screen.
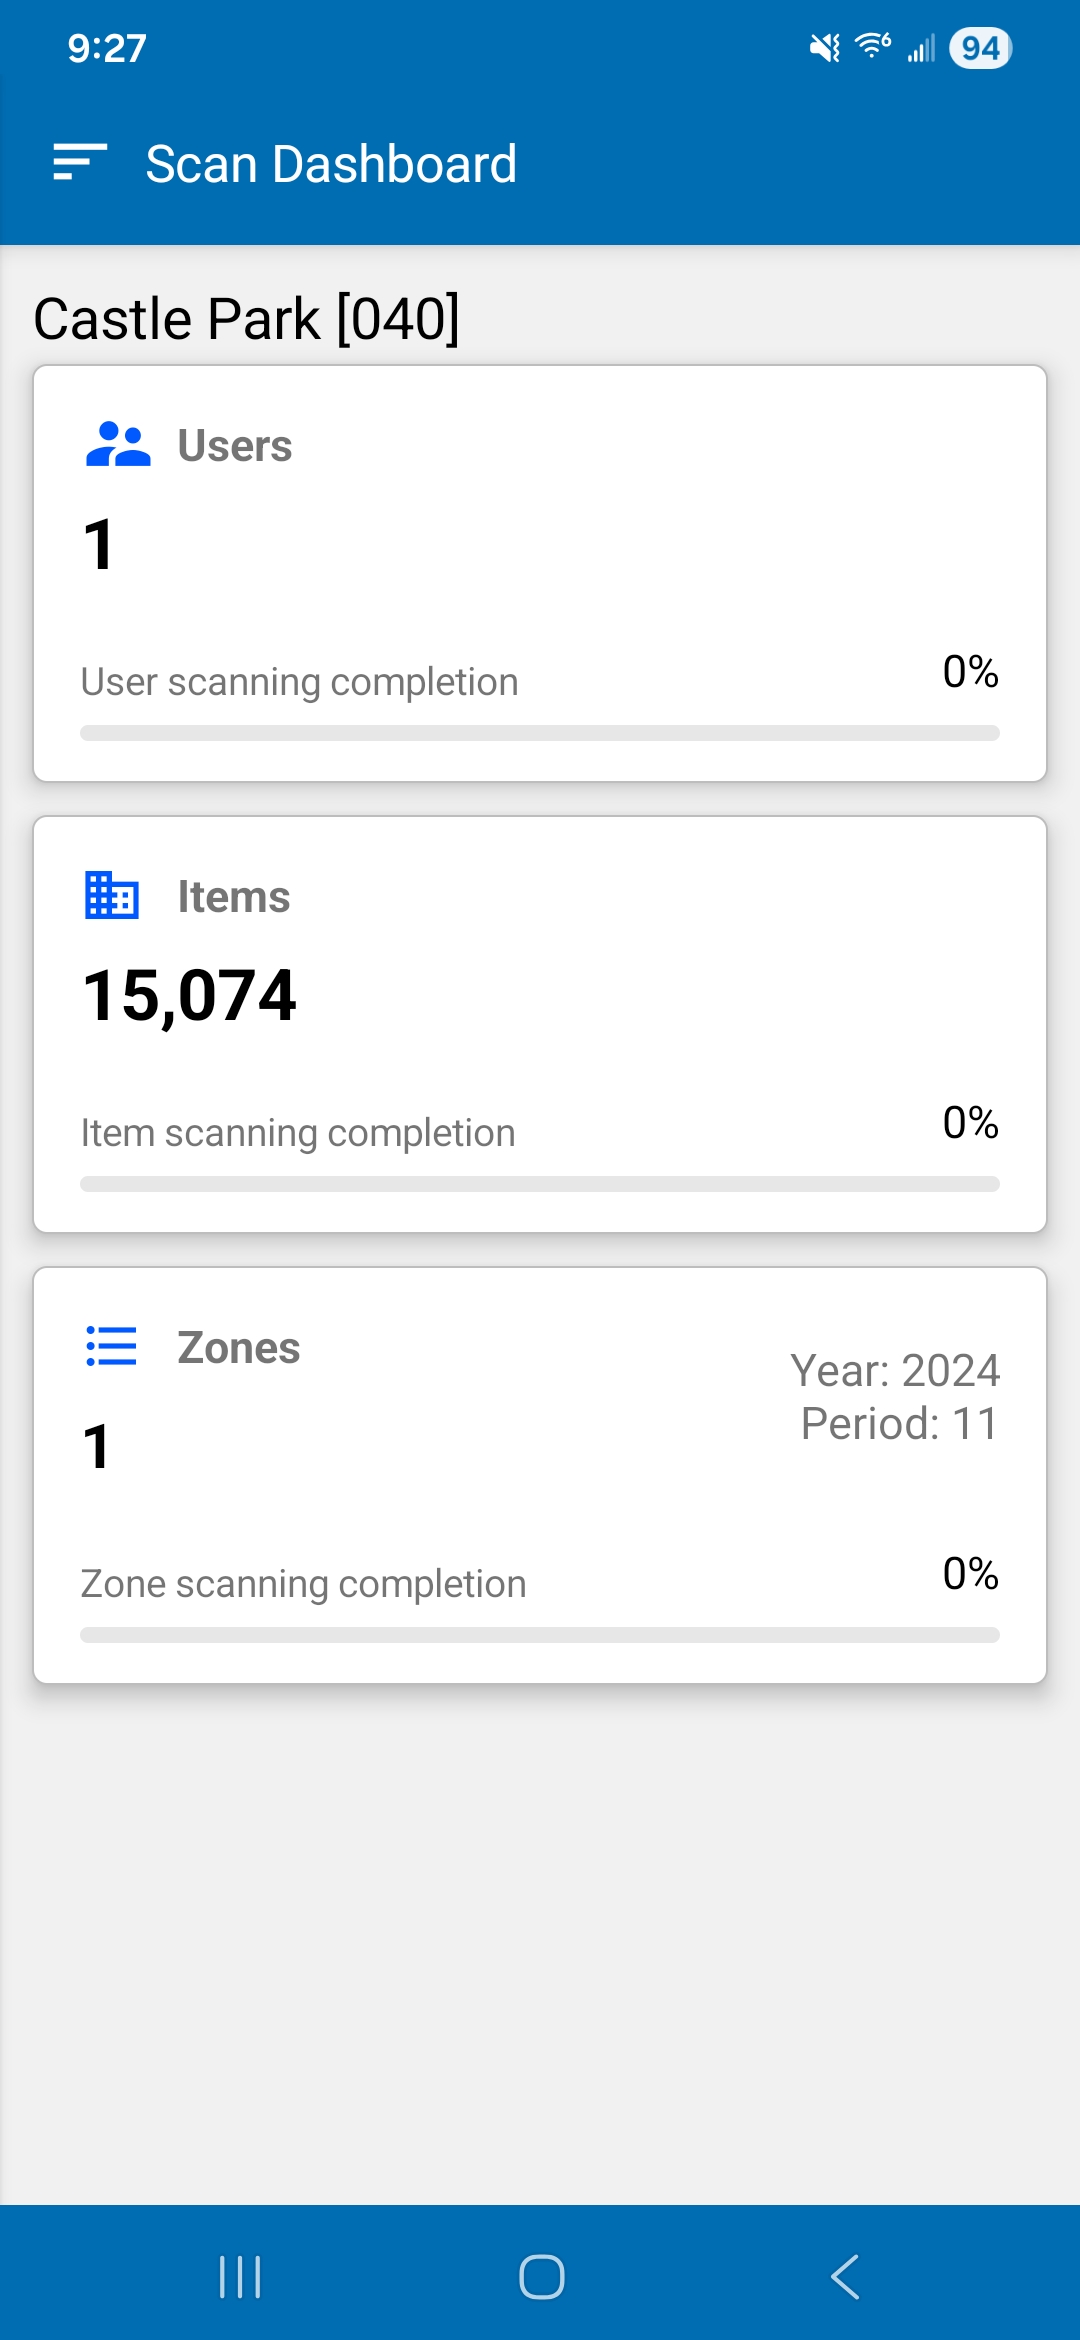
LabelScan Dashboard
This is the main screen where everything else is accessed.
Your Park Location appears at the top of the screen. If it does not, select Settings from the drawer menu and select your park.
Summary Panels - each of the 3 panels is a summary of the scan & count process. Touching on a panel will display the summary detail.
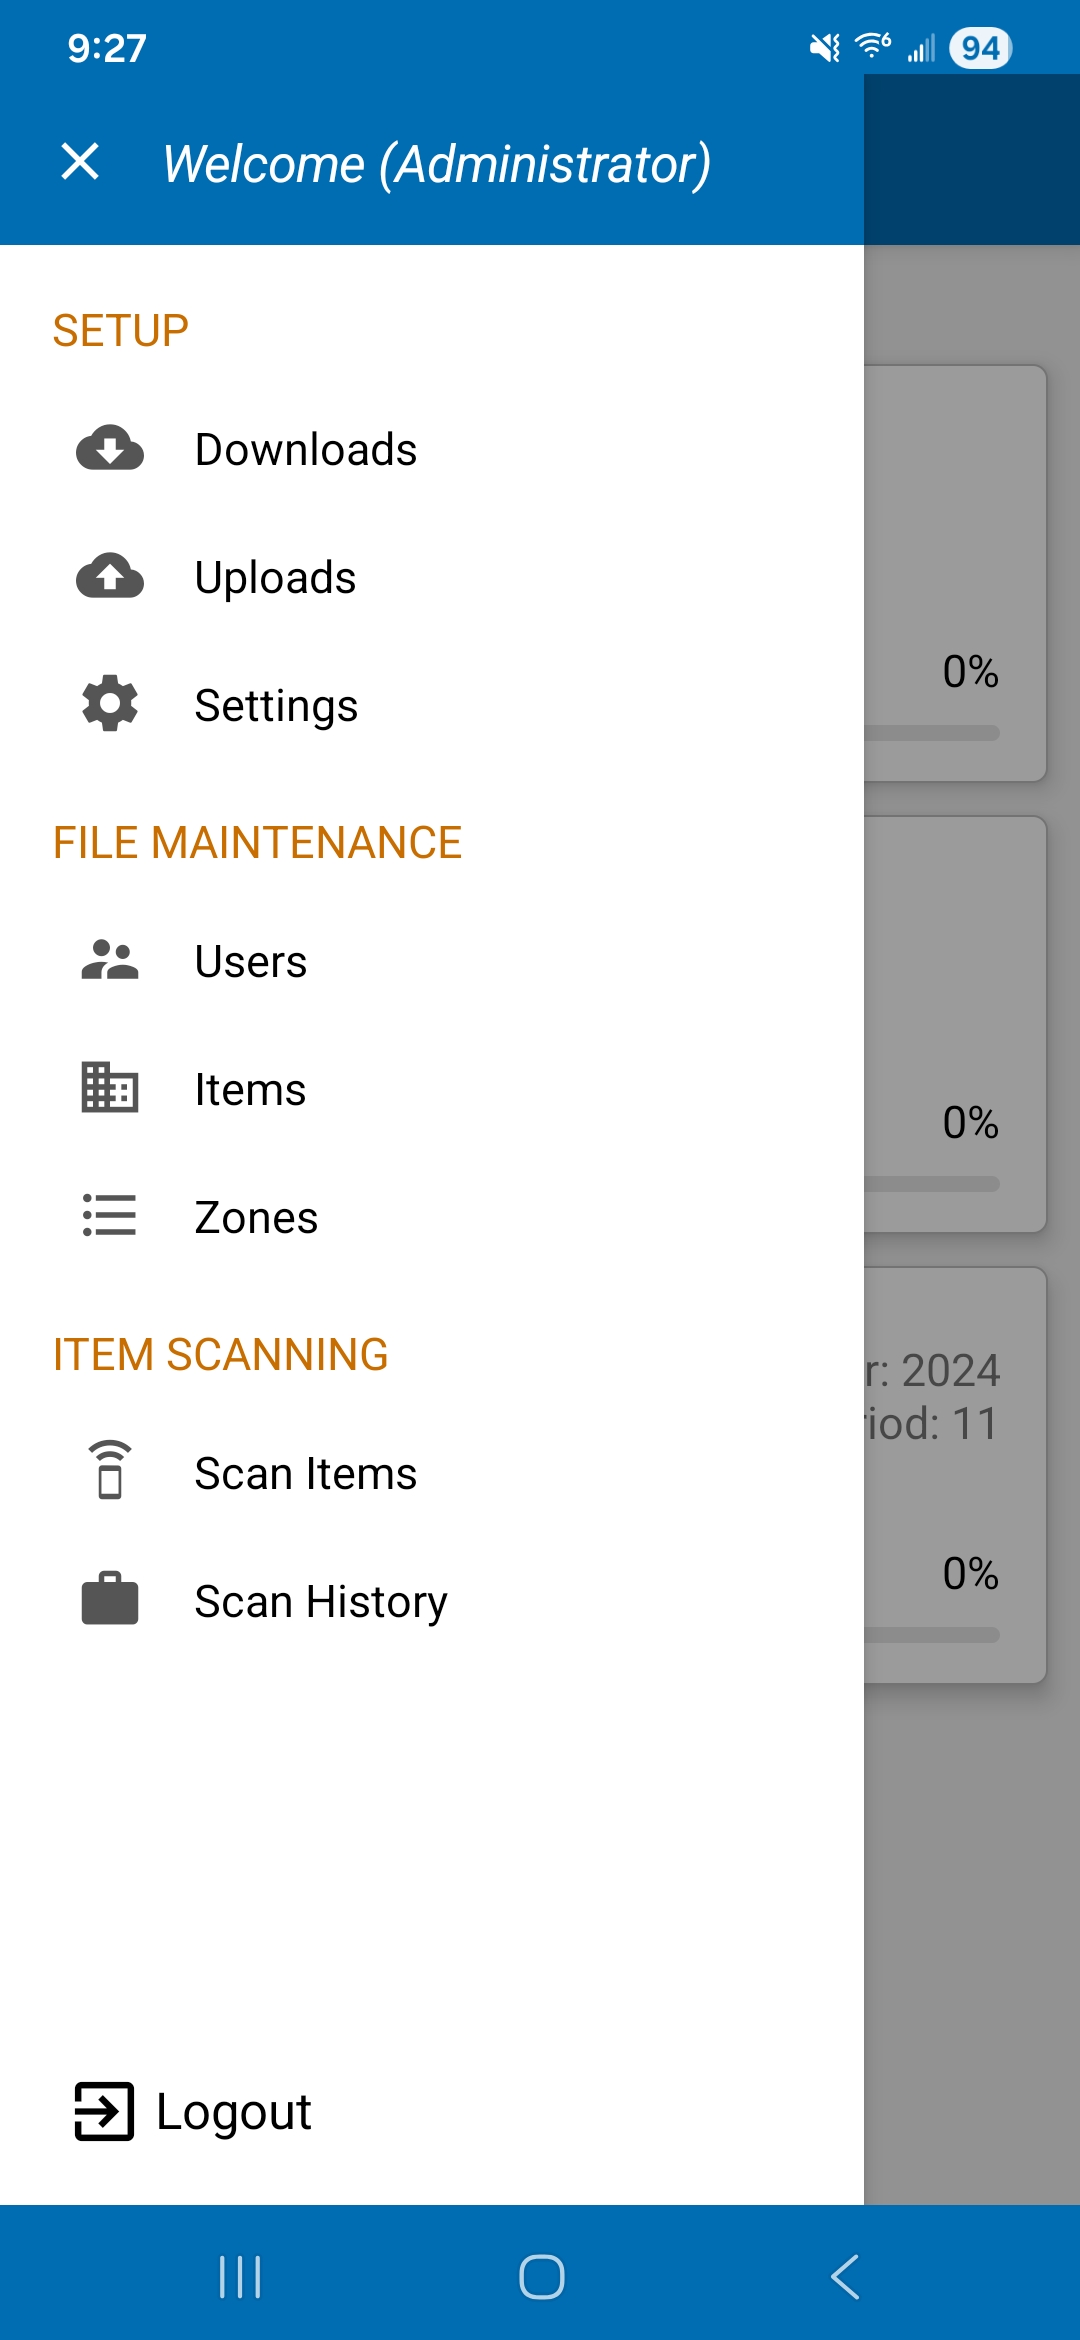
LabelScan Drawer Menu
Roles:
Admin User - if logged in as an admin user, these are all the menu options that pertain to the role as admin.Standard User - this user has only two menu options: Scan Items and Logout. That is all that is needed for this role.
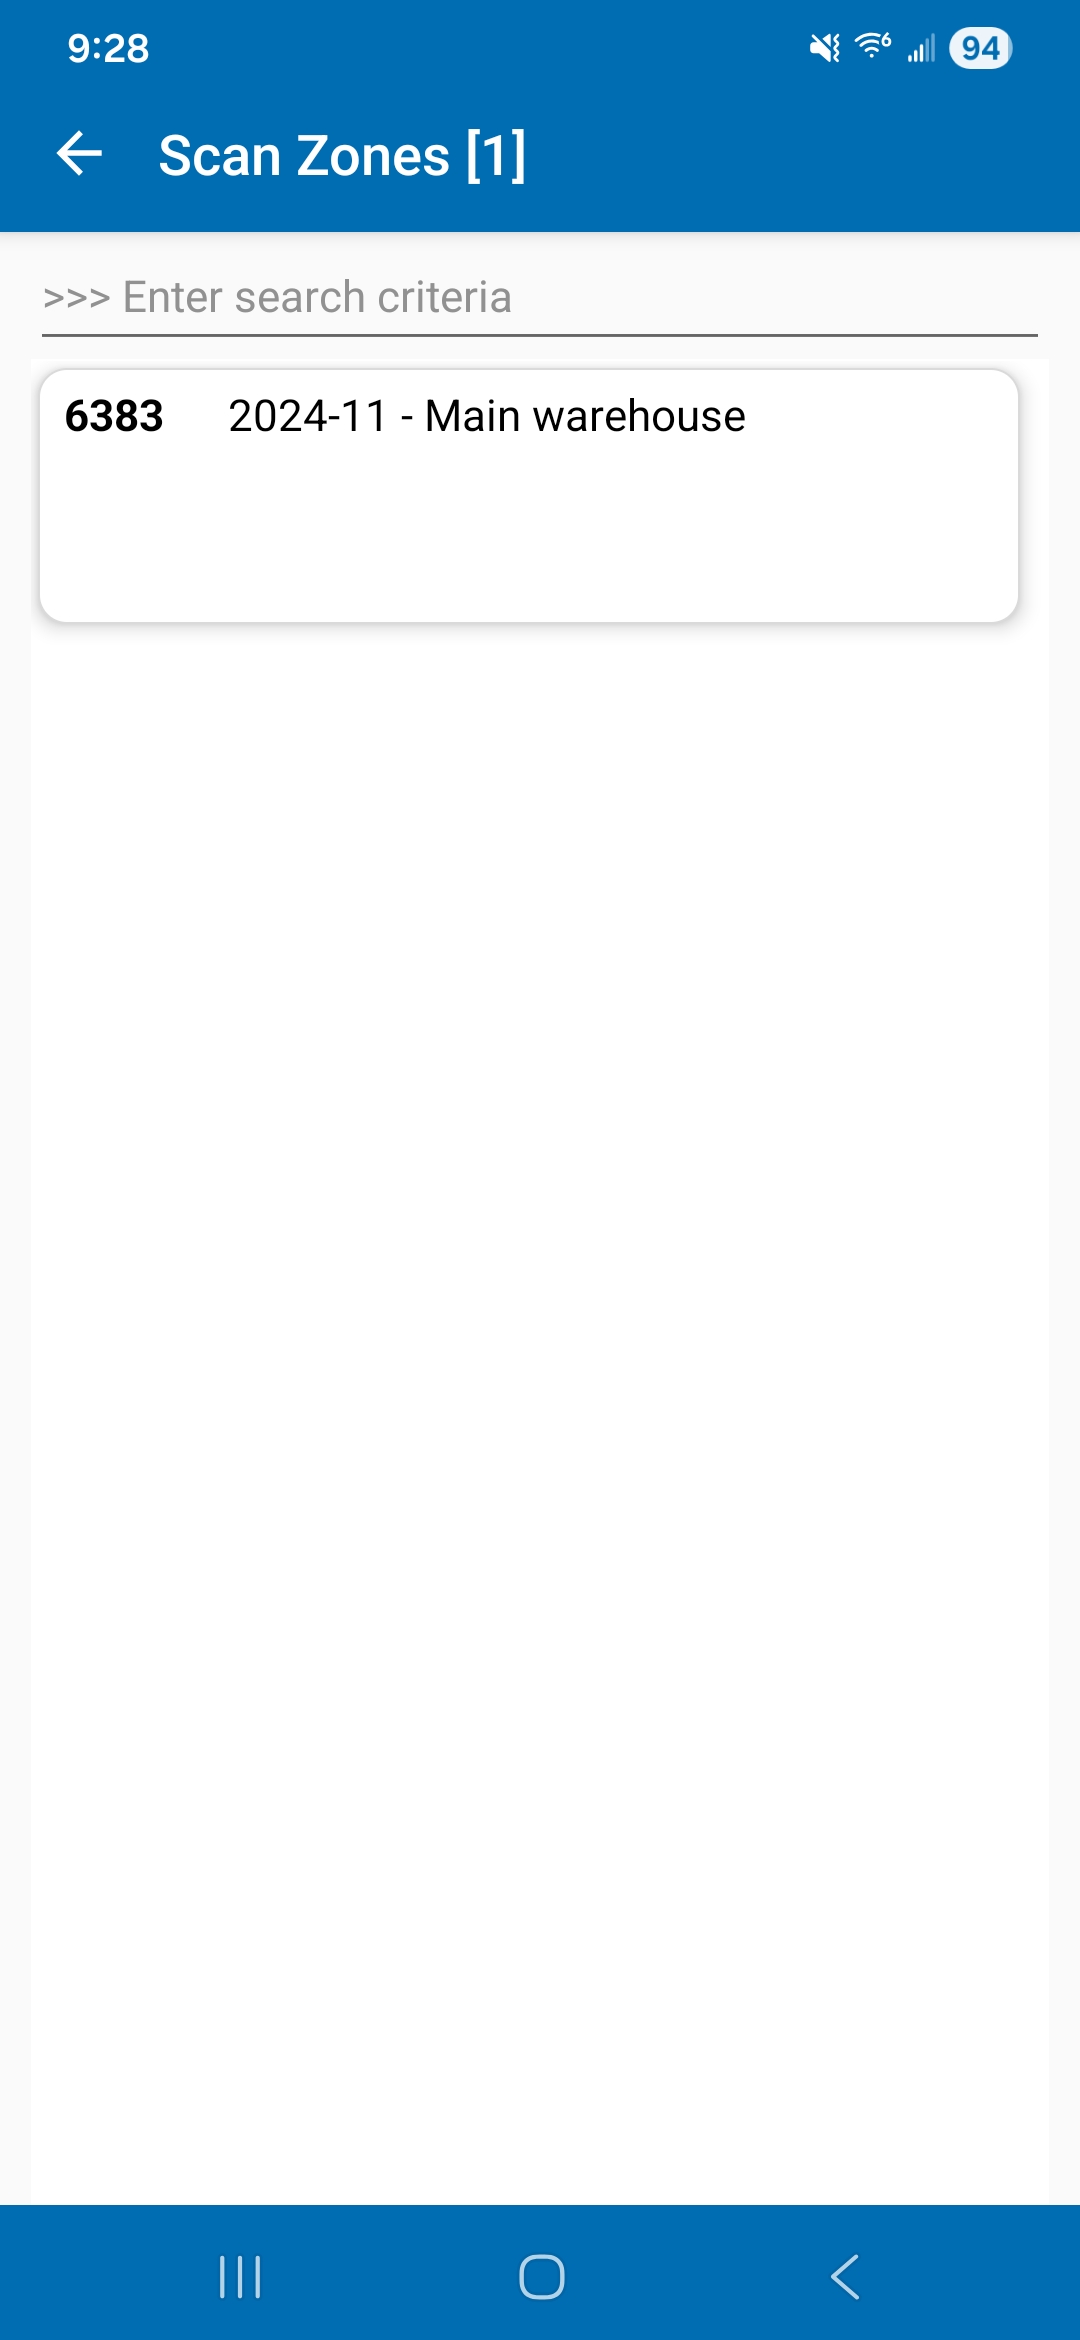
Zone Selection
Seeing this screen, the user is most likely the logged in Standard user.
Select a zone before starting the scan & count process. All predefined zones will appear in this list.
If counts have already been performed for a selected zone, the counts will appear as information under the selected zone.
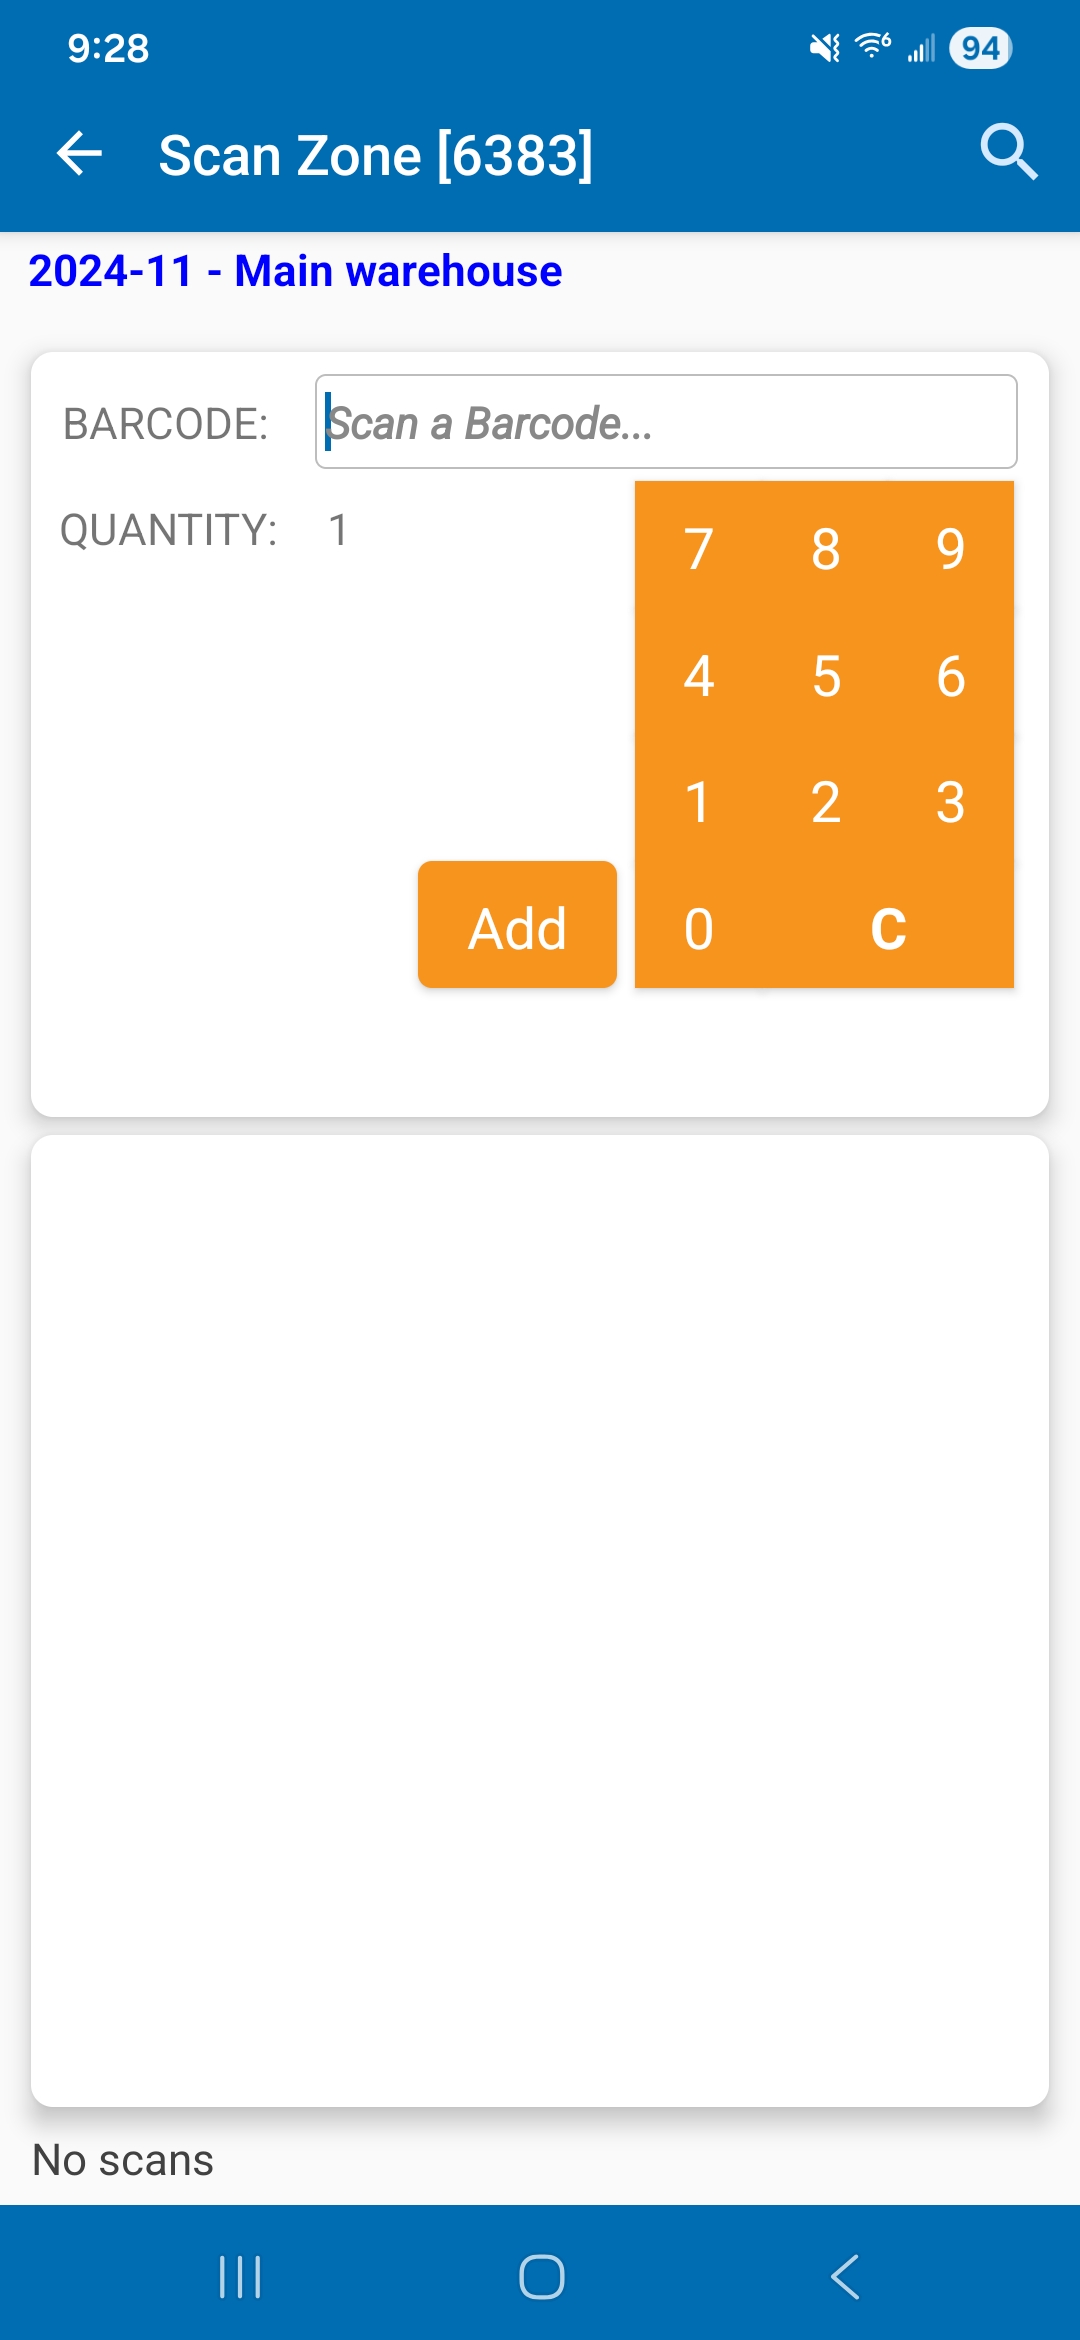
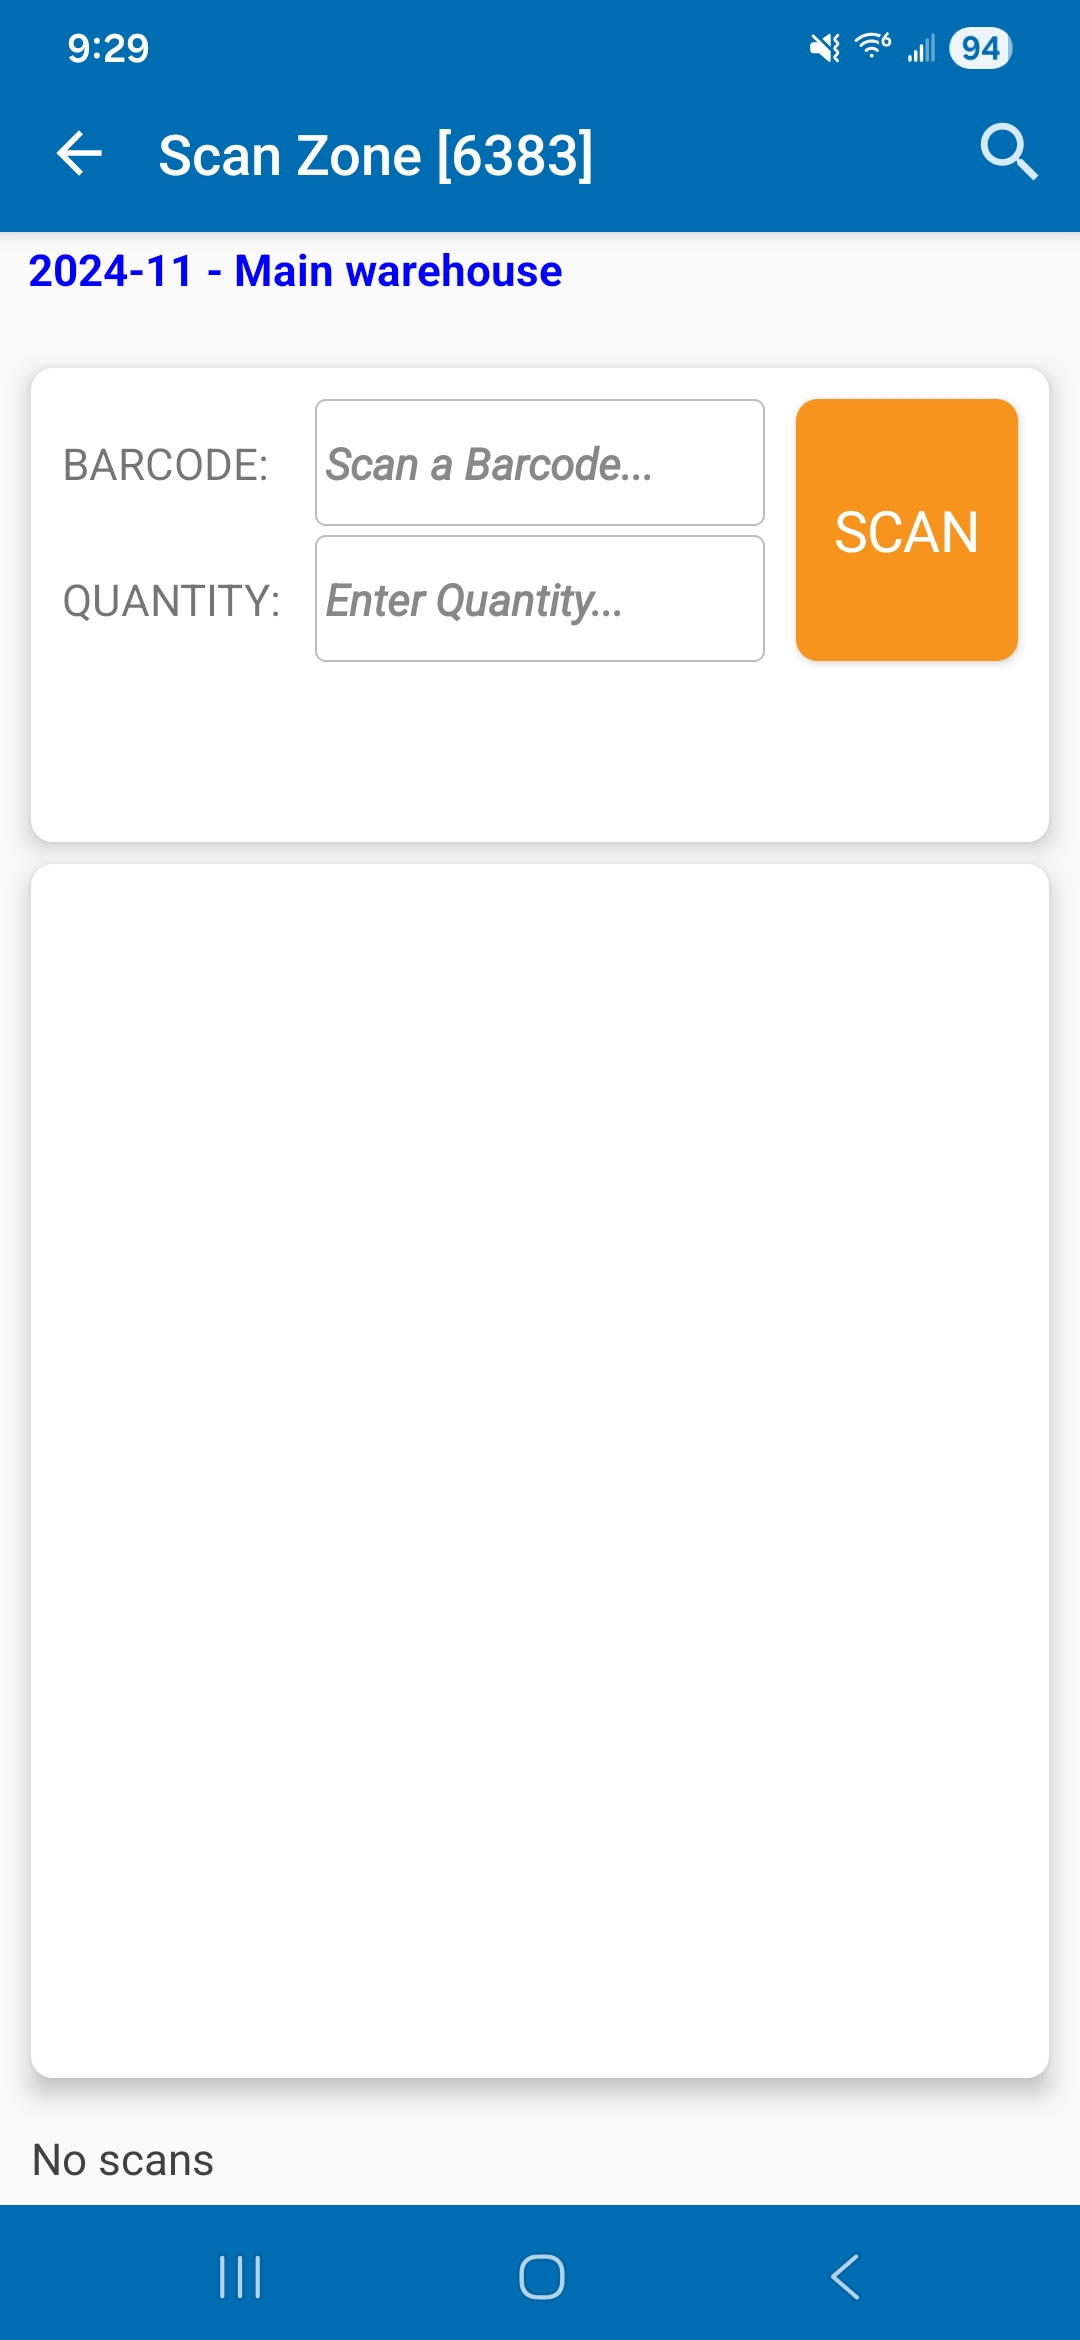
Scan Zone Scanning - Handheld Scanner
This is the screen where all scans and counts are performed.This version introdues 2 methods of how a barcode scan is performed.
Scanning Methods:
Attached Scanner - if the handheld scanner is still perferred for scanning barcodes, then select this method on the Settings screen. This method performs better with devices with low resolution cameras. Under these conditions, select this method.Device Camera - if you want to be free from holding a scanner, then select this method on the Settings screen. This scanning method works exceptionally well with devices with high resolution cameras.
This screen is acessed by selecting the Attached Scanner on the Settings screen.
Scan Zone - Camera Device
This is the alternate screen for scanning and counting items. It takes advantage of using the devices camera to scan a barcode. Therefore, you work with a hand free from the handheld scanner.
This screen is acessed by selecting the Camera Device on the Settings screen.
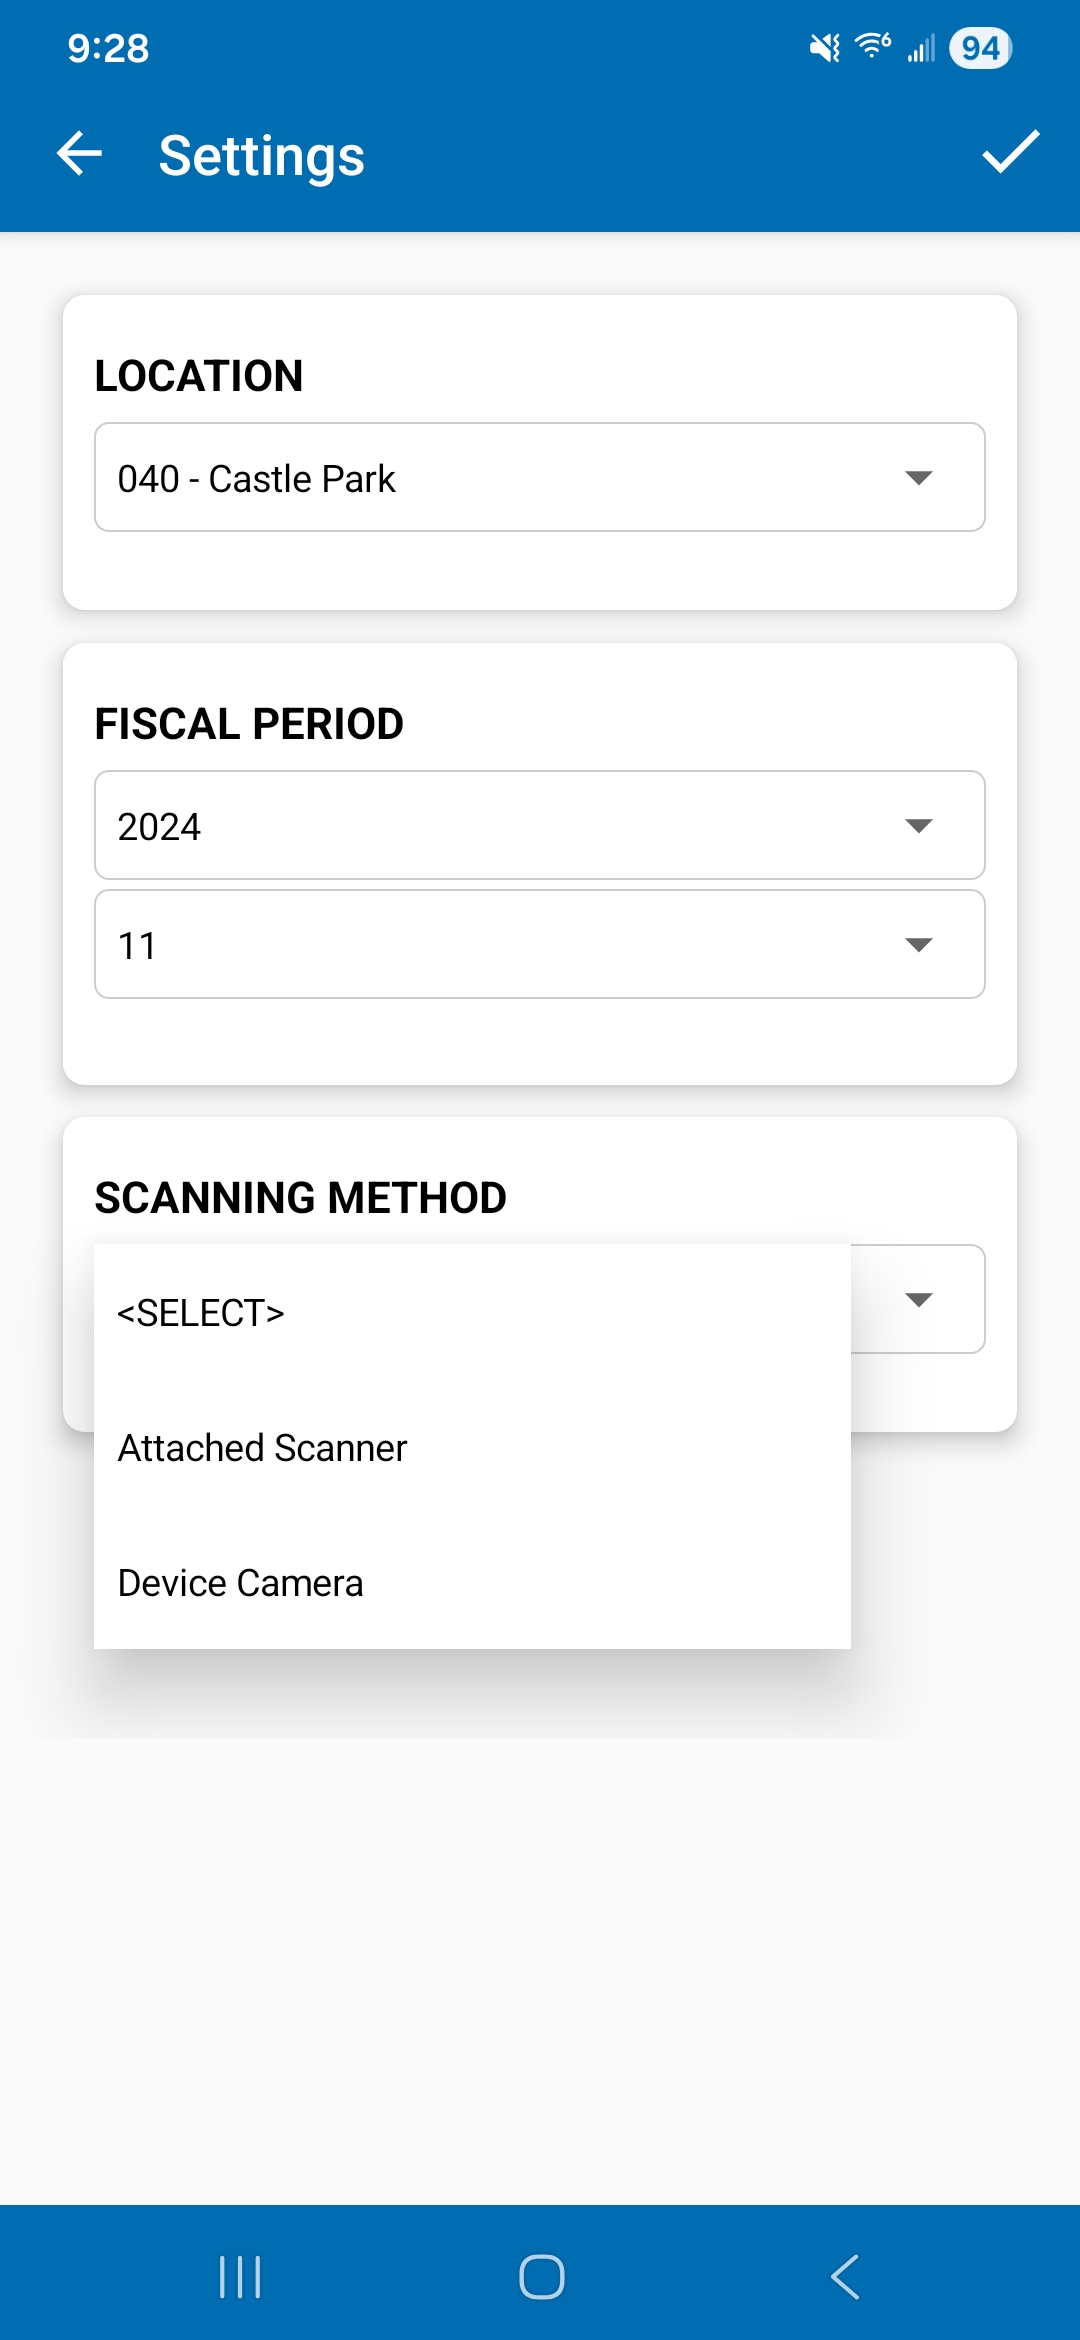
Settings
Location - select the default park for your counting operations.
Fiscal Period - select which inventory counting period the count is to be performed.
Scanning Method - select the preferred scanning method.
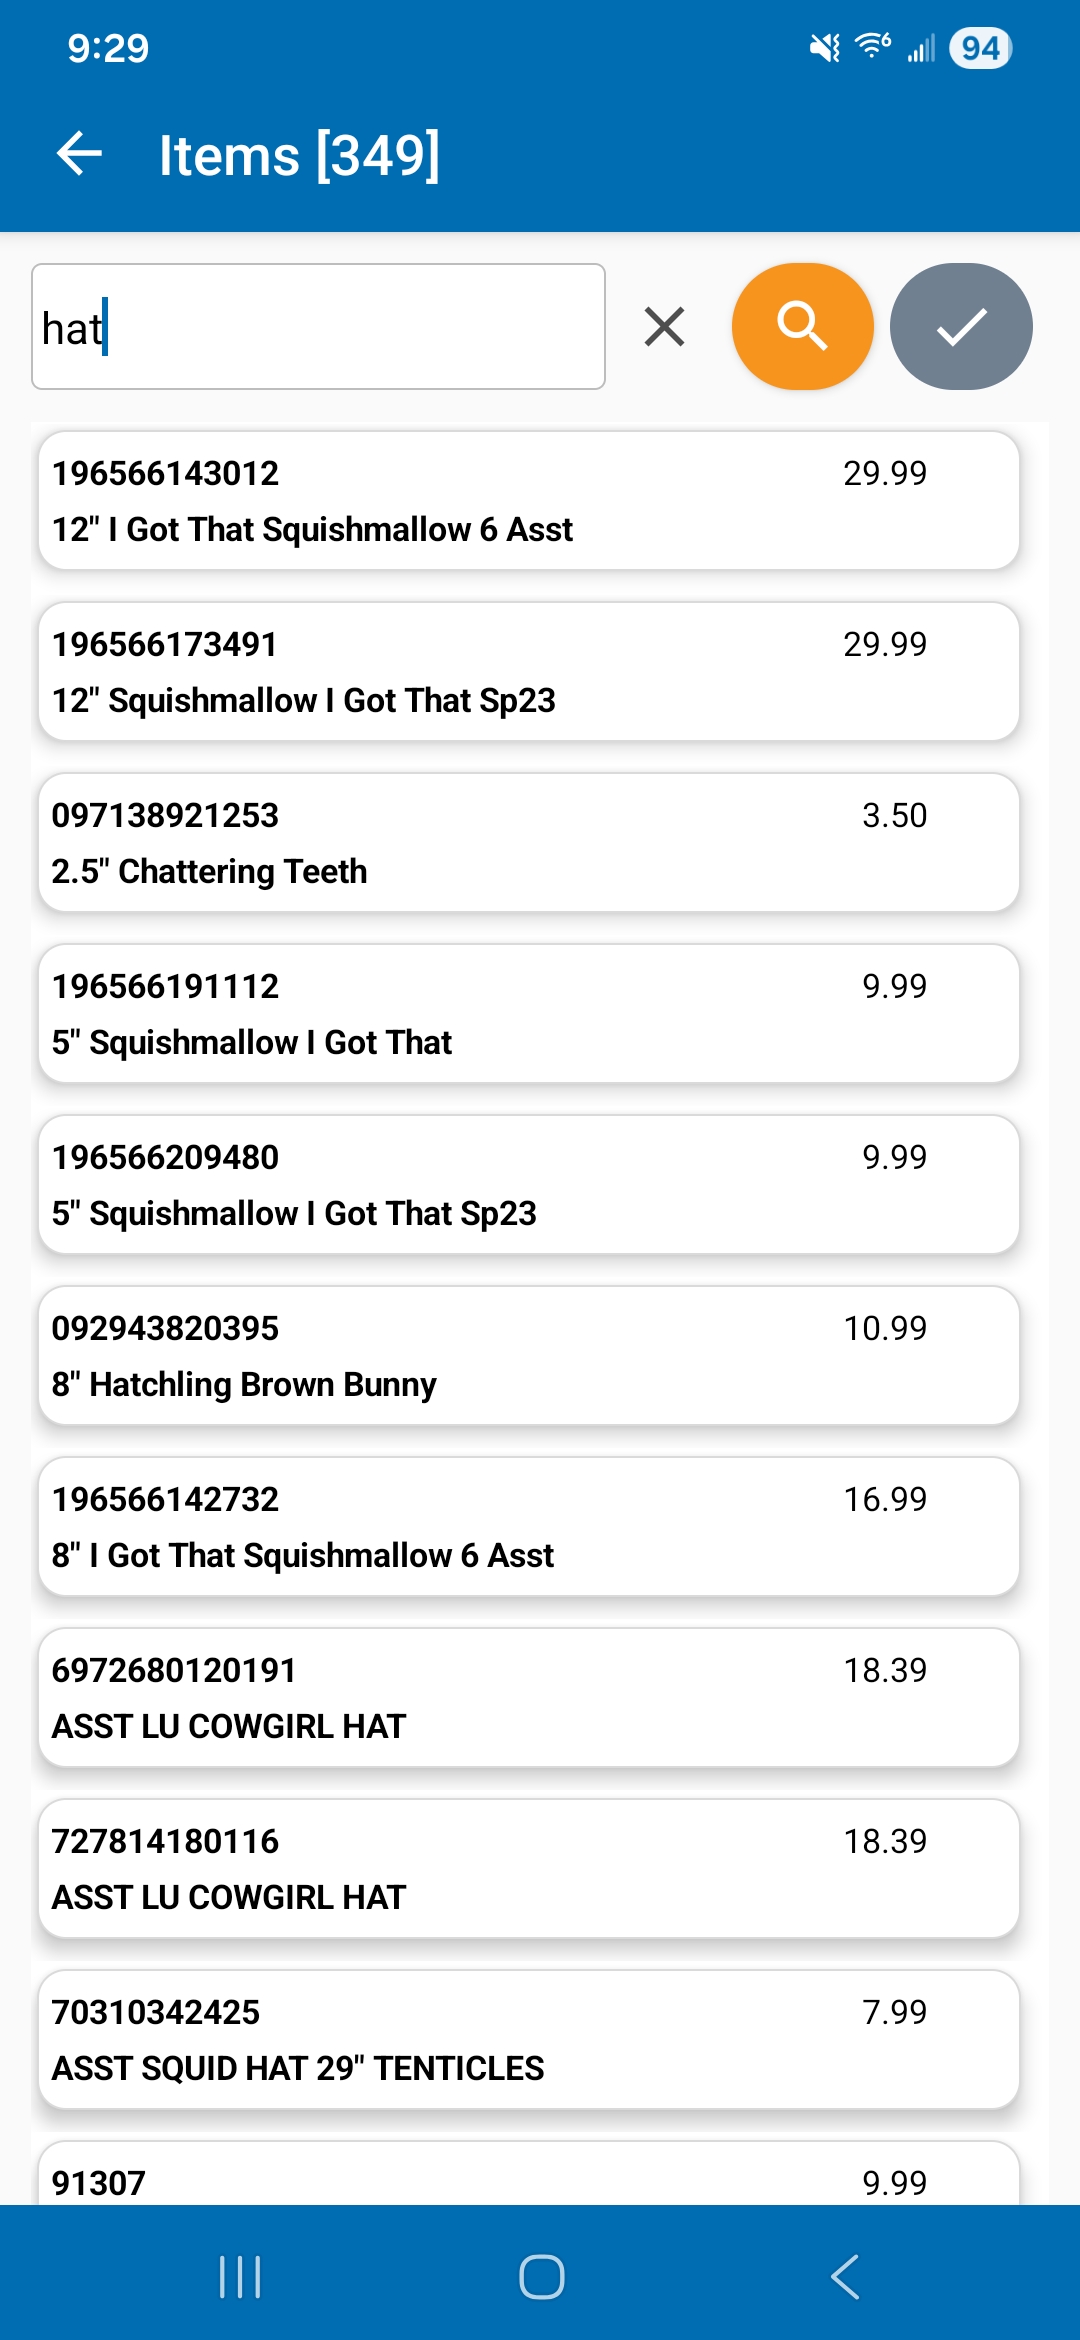
Item Search While Counting
While scanning items and there is a need to lookup an item, touch on the magnifying glass icon on the top right menu bar of the Scan Zone screen. This screen will appear.
To find an item, enter either the PLU number or Description text. The search mechanism supports incremental searching, meaning as you type, the search is applied, returning found items to the list.
Selecting the Item - when the item is found, touch on the item row. The select icon is enabled. Touch on it to confirm the selection. The Search Items screen will close, returning the selected PLU to the Scan Zone screen.
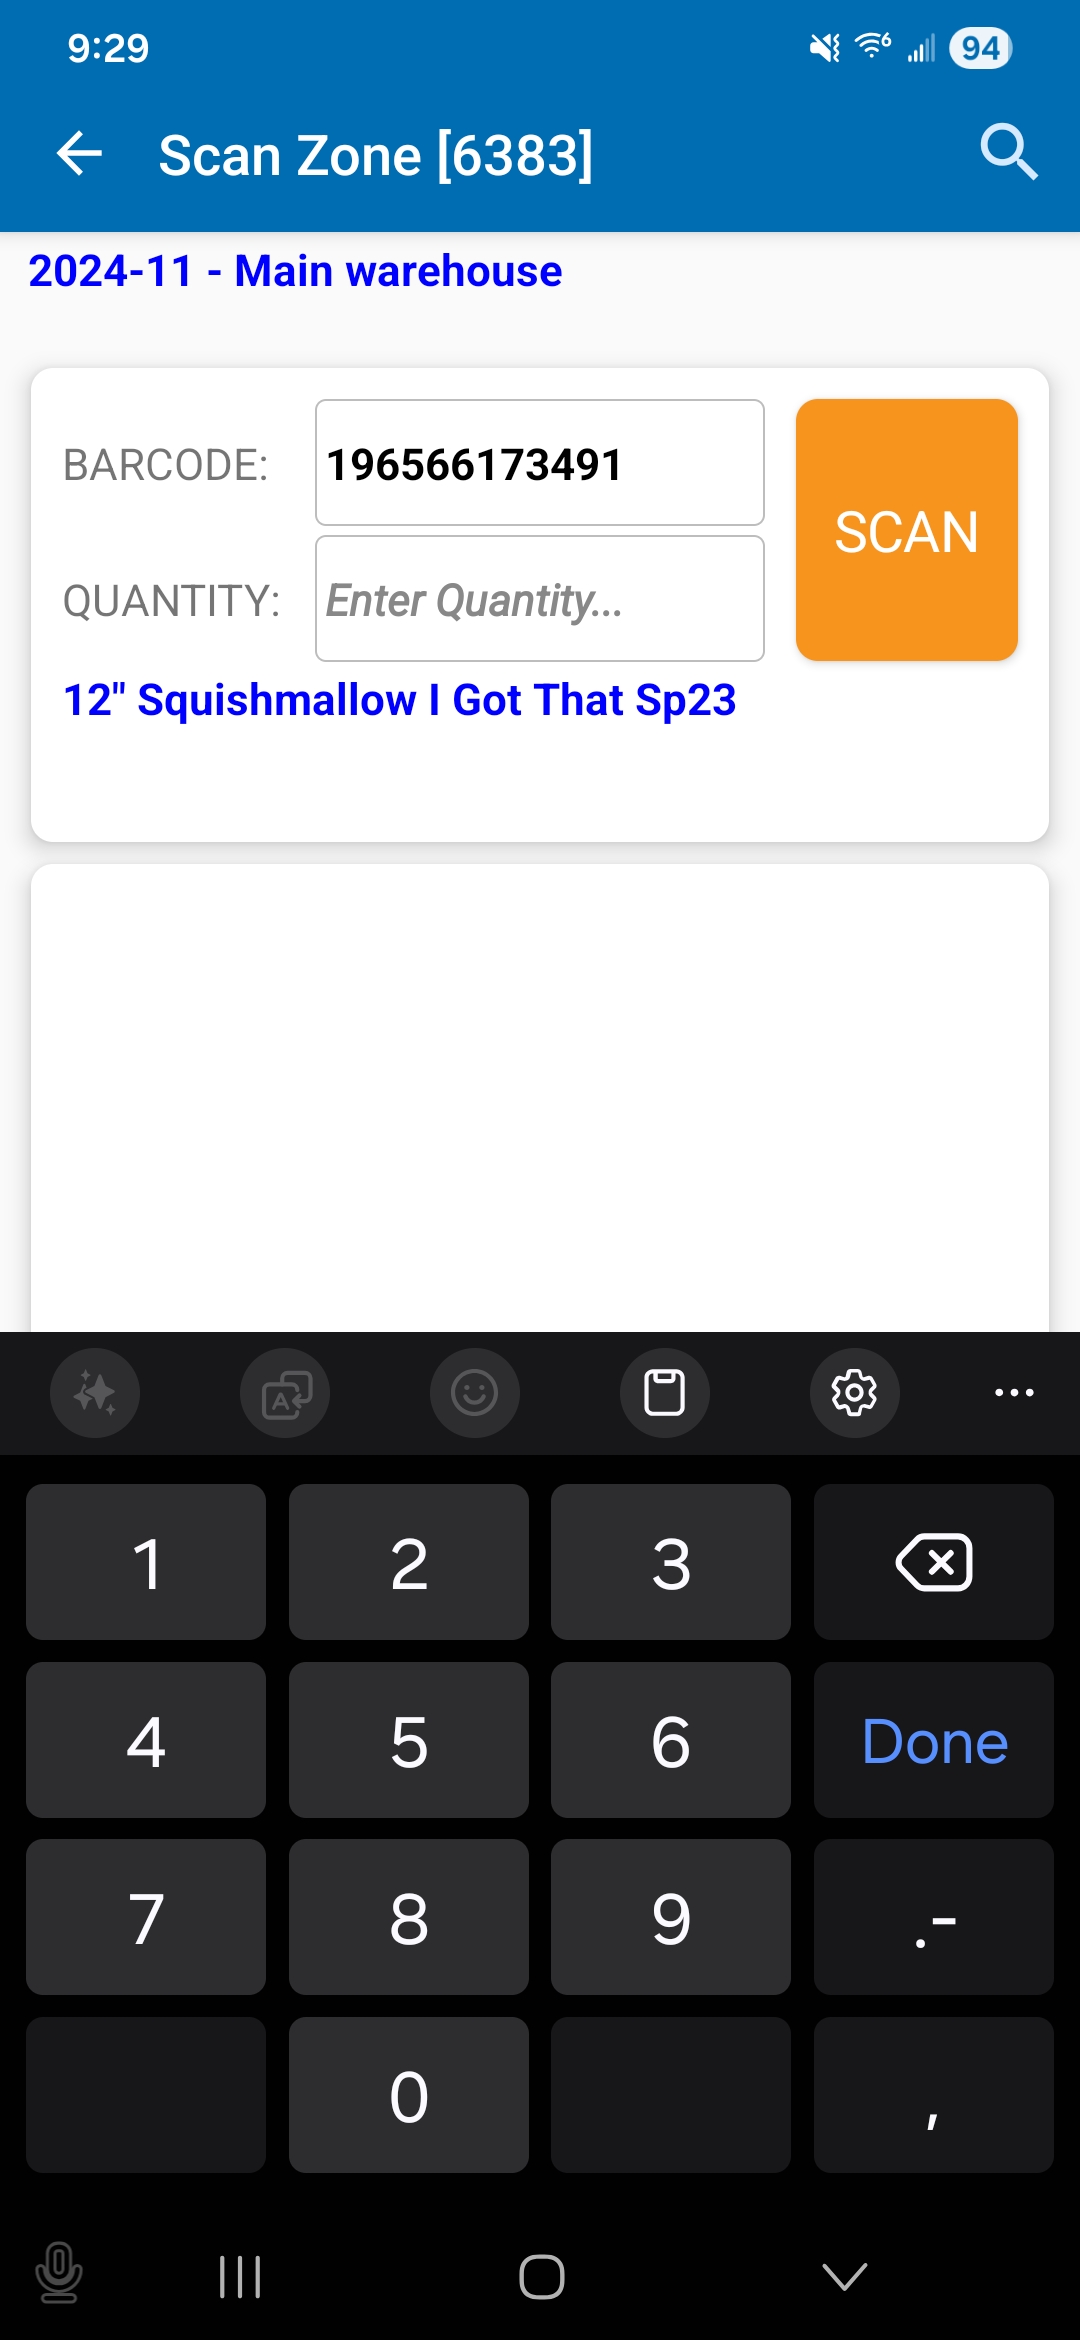
Scan Zone - Enter Count Quantity
After either scanning the barcode or after searching for an item, you will now be prompted to enter the count quantity for the selected item.
Type in the quantity on the numeric touchpad, and press Done.
The scanned item will be accepted and saved to the database. The scanned item will then appear in the scanned items list.
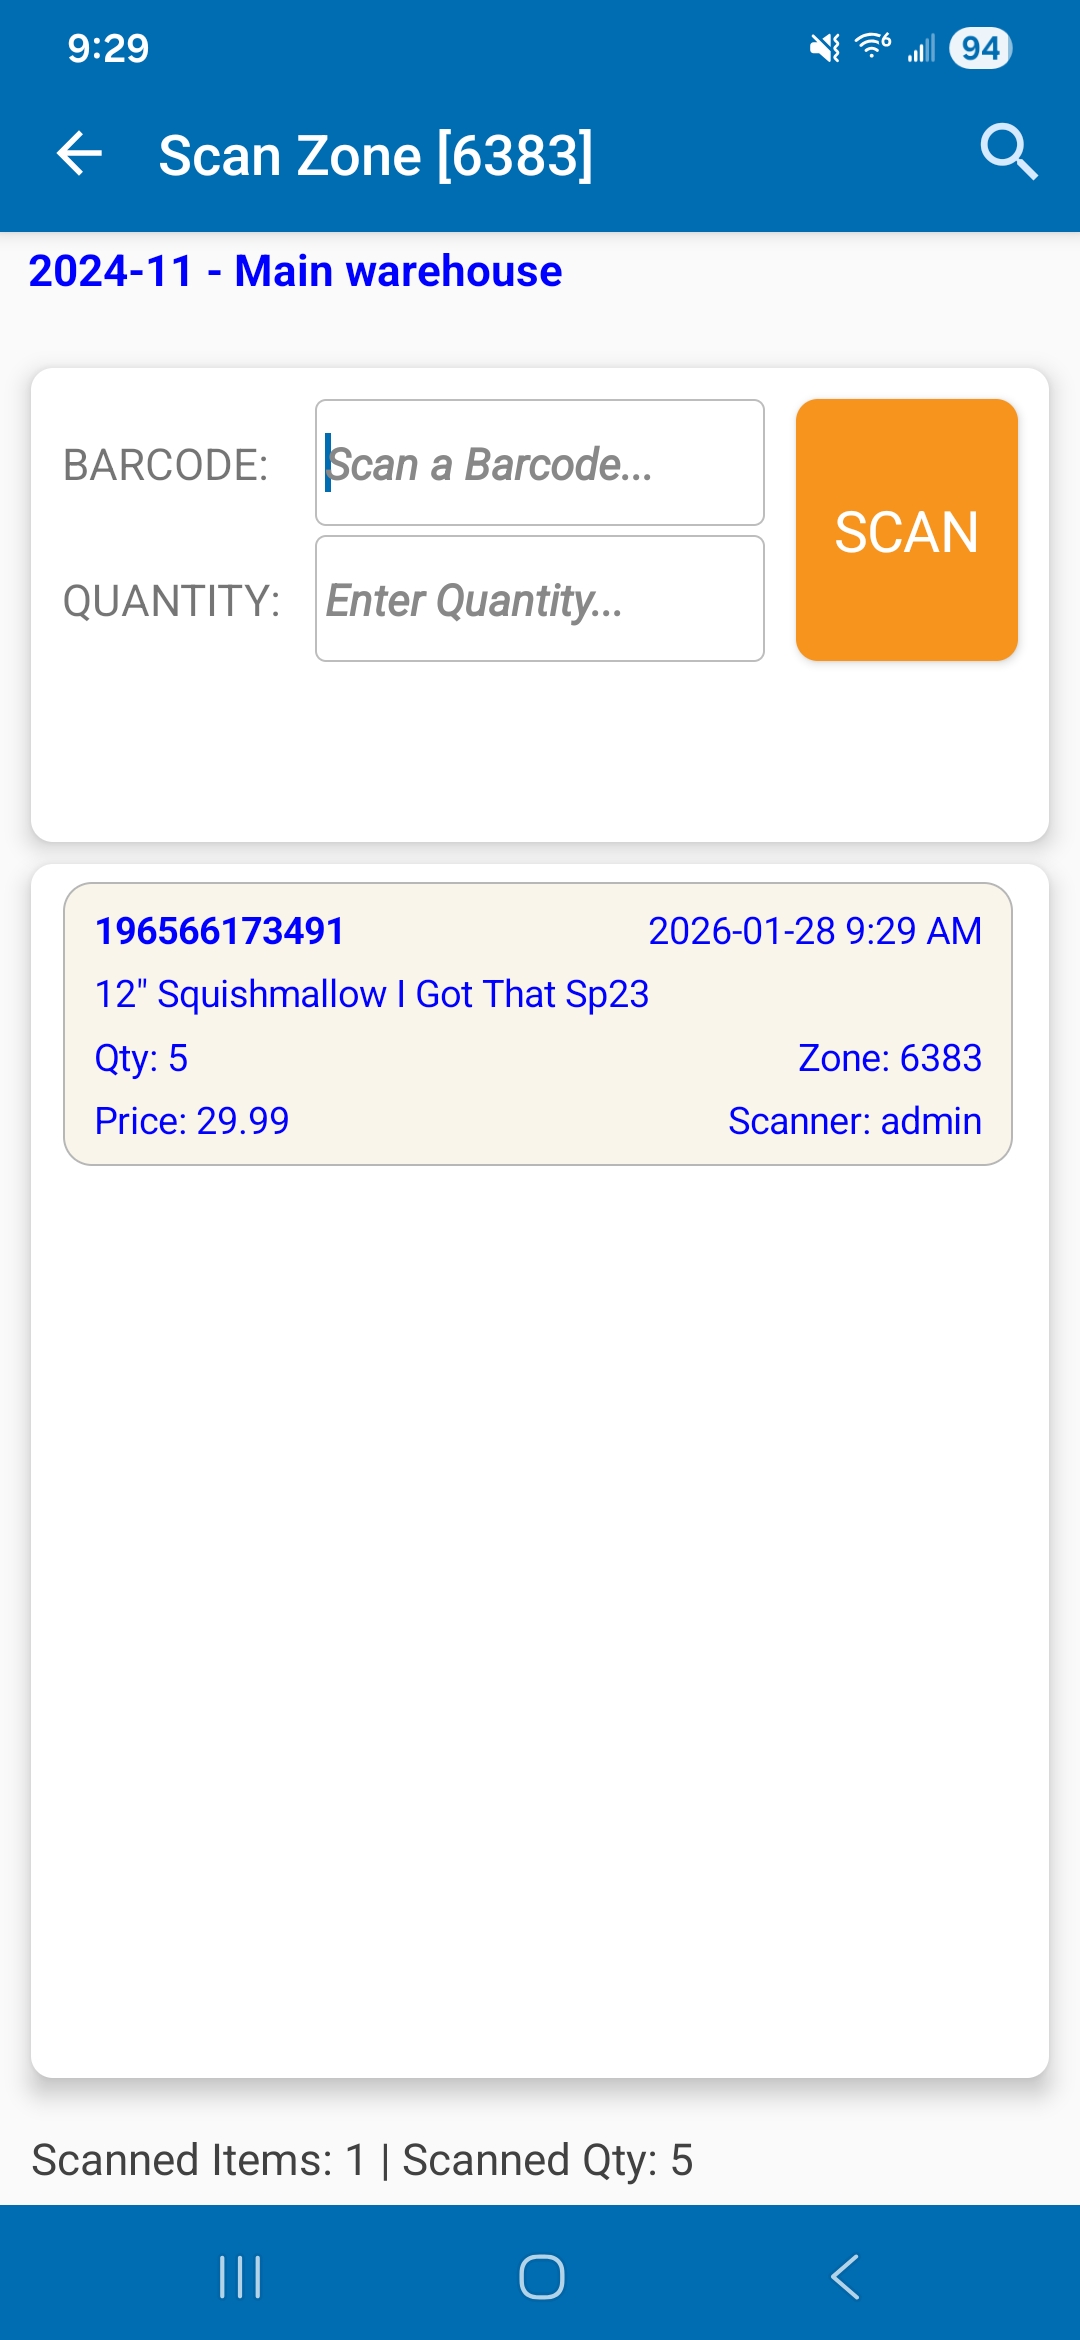
Scan Zone - Scanned Item List
All validated scanned items will appear in the lower list. These are the items that belong to the selected Zone.